How to Make a Real-Time AI Surveillance Camera with Raspberry Pi and OAK
Jan 14, 20211. Introduction
Today we are going to build our own Real-Time AI Surveillance Camera using a Raspberry Pi!
The Problem that we are trying to solve is, that there are not many real time Raspberry Pi CCTV camera solutions online and if they are real-time, then the processing is not an embedded solution, its done on a server, PC or cloud . Another option is to use something like a Neural Compute Stick or Google Coral, which is great but their form factors are slightly bulky especially when we are trying to minimize our security camera size.
Instead we are going to try using the OpenCV AI Kit attached to almost any Raspberry Pi even a Raspberry Pi zero for a small footprint surveillance camera. So lets get straight into it!
2. What you will need
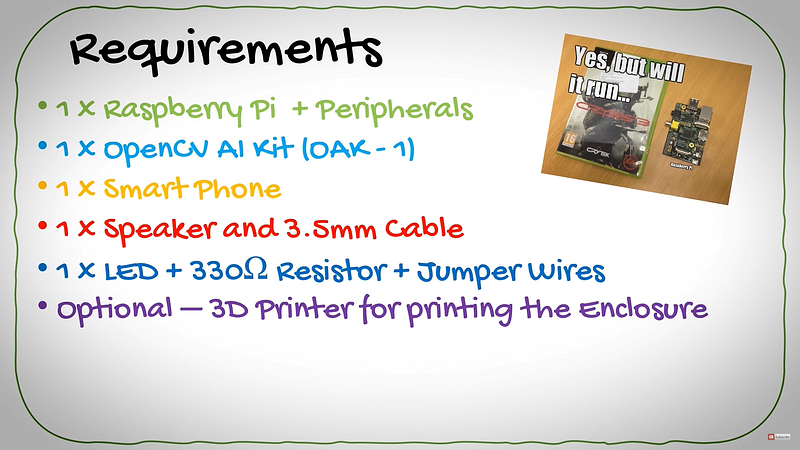
Regarding the requirements you will need the following:
- A Raspberry Pi of course. Version 3 or higher will work, as well as all the peripherals to make it work, like cables, a monitor, keyboard and maybe an a enclosure and heatsink.
- The OpenCV AI Kit which comes with a USB C cable.
- Any smart device that is capable of running team viewer — I will use my Samsung Galaxy Note 20 Ultra.
- A speaker from which to play the sound with a matching 3.5mm cable aux cable
- An LED for flashing the intruder in the eye, just kidding. Don’t forget having jumper wires and a 330Ohm limiting resistor for the LED.
- And finally, this one is optional. We will use a 3D printer to print the enclosures for the smart camera.
3. How it works
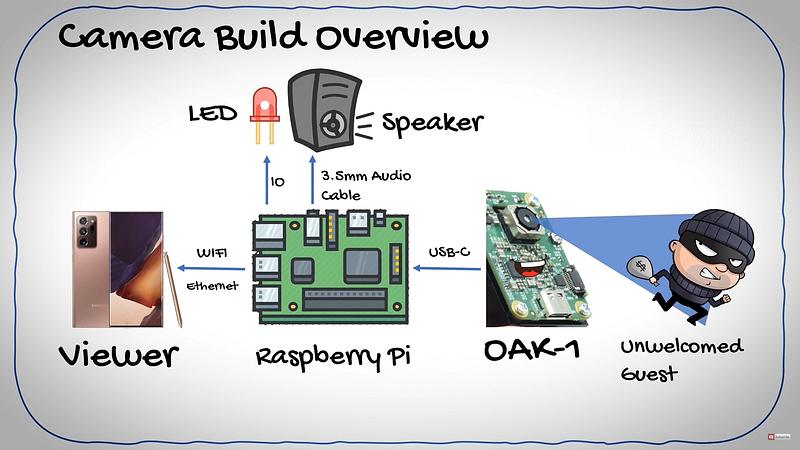
It all starts of with our Unwelcomed guest, this intruder may be human or even an animal, I will show you a custom example for more practical surveillance applications in the video.
The intruder gets detected by the OpenCV AI Kit at 30 Frames per second, the video + the detections are sent over a USB C cable into the Raspberry Pi.
The Raspberry Pi has connections to a speaker or powered siren via the audio jack. You can even connect it to your headphones to test. And then we have an LED connected to the GPIO ports. Instead of an LED, with additional circuitry you swap out the LED for a flood light.
And lastly we would want to view the output from our camera. Now we could install motioneyeOS or have a webserver to view and record the detection. However, I opted for the easier road by just using TeamViewer remote desktop from my Android phone to view the captured video on the Raspberry Pi.
4. Schematic
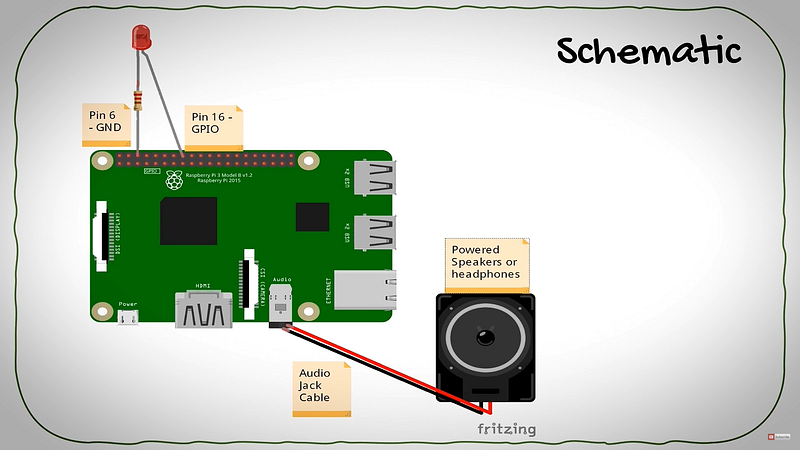
The schematic which I haphazardly drew in Fritzing.
So First up we need to hook up our LED Anode to the GPIO pin 16 and the Cathode to a limiting resistor to ground at Pin 6. Thereafter we can connect either our powered speakers or headphones through the audio jack port on the Pi, is simple as you can see from the schematic.
5. 3D Printing
We need an enclosure for our camera. There’s two ways we can do this. Design an all in one Box for both the Pi and OAK device or we could just make a case for the OAK-1 and run our USB c cable to a hidden Raspberry Pi.
I’m going to opt for the second option. Which will allow our camera to be position discreetly… and also because it’s the easier option.
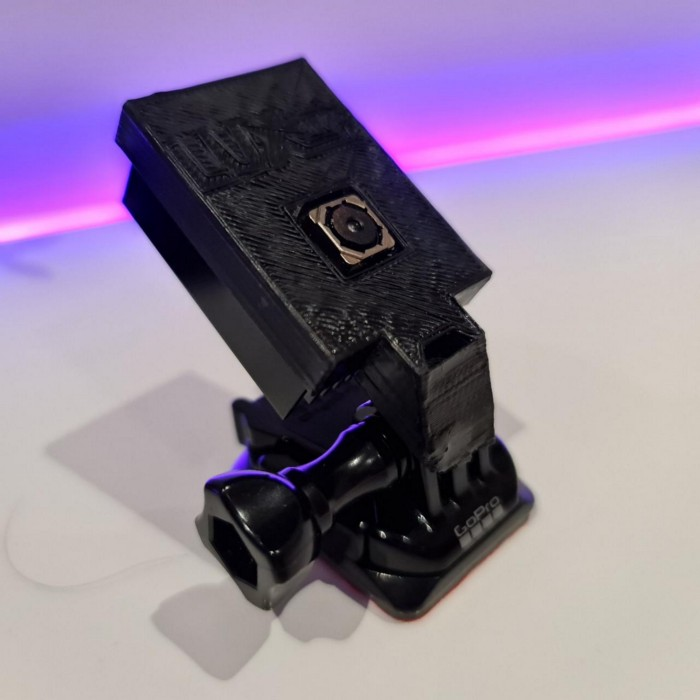
If you head over to this GitHub link, you will find a variety of cases for both the OAK-1 and OAK-D that you can 3D print.
I’m going to go with the one which has a gopro mount. There’s also another which has a lens mount which is really cool!
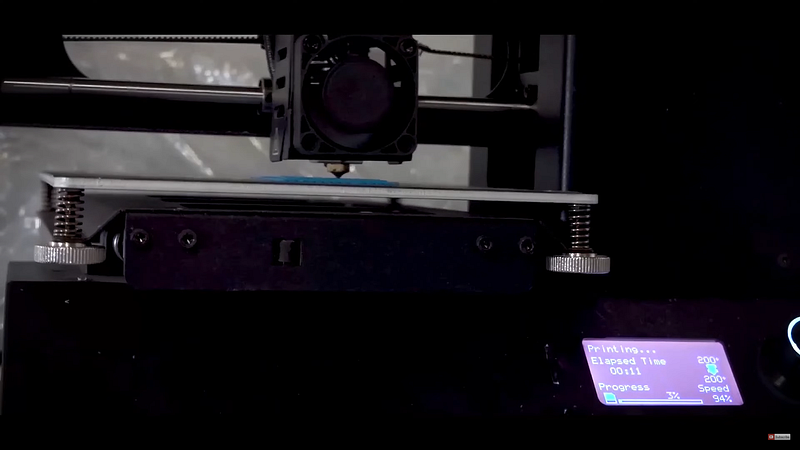
Now the rest is simple, just import it into your favorite slicer software. I’m going to Curo, Set my Resolution to 0.2, Infill of 80% and put this thing with a Brim or Raft.
Right Copy to SD Card, and lets start printing!!!
Spray paint it with some inconspicuous black spray paint, to give it that stealth look.
6. Code
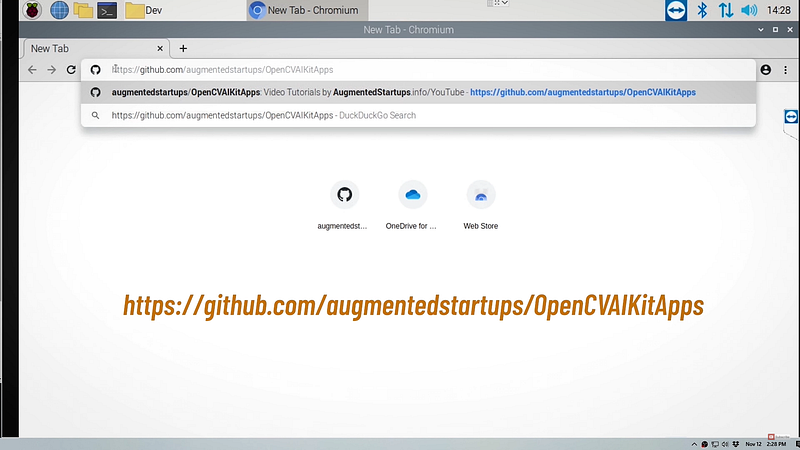
First up head over to this GitHub repo:
I want you to git clone this repo, where you will find the base and final code of the App:
git clone https://github.com/augmentedstartups/OpenCVAIKitAppsFor Apps 1–5, you can check out this tutorial playlist.
The base essentially is what we will use as the template of our code, and the final is incase you just want to copy and paste, if so you can skip ahead to the integration part of this video.
Once the file has downloaded, we can go ahead and extract all the files.
If you don’t already have DepthAI installed:
python3 -m pip install -r requirements.txtpython3 run_app1_base.py7. Summary
Testing it out, we can see that when a person is detected we are
successfully able to sound an alarm and light up an LED which could later be upgraded to a flood light.
From 80-Hour Weeks to 4-Hour Workflows
Get my Corporate Automation Starter Pack and discover how I automated my way from burnout to freedom. Includes the AI maturity audit + ready-to-deploy n8n workflows that save hours every day.
We hate SPAM. We will never sell your information, for any reason.